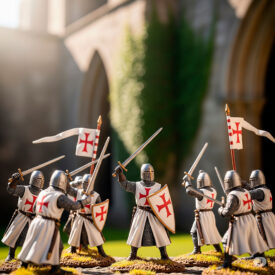
Legend has it that the warrior who cherishes his memories also preserves his honor. Today, that memory can sit on a shelf in your living room: a miniature armor that encapsulates centuries of forging, design, and symbolism in a scaled-down piece of metal.
In this article, you will discover why miniature armors are much more than decorative objects: they are pieces of condensed history, learning tools for hobbyists and artisans, and collectibles that require discernment when choosing. You will learn to distinguish scales, materials, and manufacturing techniques; you will know how to preserve them, how to integrate them into small spaces, and what the relationship is between decorative replicas and miniature technical models.
What exactly are miniature armors?
When we talk about miniature armors, we refer to scale replicas of historical protective gear: helmets, breastplates, greaves, bracers, and complete sets. These pieces can be faithful reproductions for collectors, stylized reinterpretations for decoration, or didactic models intended for technical study and historical reproduction.
There is a semantic ambivalence: in civil engineering, an “armadura” (armor/frame) is a structure based on triangulated elements (truss). However, in the context of historical reenactment and decoration, “armadura” refers to the body harness worn by the warrior. This article addresses both meanings when illustrative: the miniature as a decorative replica and the miniature as a didactic model.
Types of miniature armors
Decorative replicas
Replicas designed for display. Their objective is aesthetics and visual fidelity to a historical design. They often include ornamental details, aged finishes, and, occasionally, textile accessories in linen or leather to scale.
Collection models and scale figures
These are made for collectors looking for pieces in common scales (1:6, 1:10, 1:12, 1:18). They often combine metal and resin to achieve fine details without increasing excessive weight or cost.
Didactic models and technical scale models
Used in teaching or research, these are functional miniatures that reproduce articulations or protective layers for the analysis of movement and historical ergonomics. This category also includes models of structures (armors/trusses) used in engineering to study loads.
Materials and manufacturing techniques
Miniatures can be made of metal, resin, wood, plastic, or a combination of materials. Each choice affects aesthetics, weight, and durability.
| Material | Advantages | Disadvantages | Common Use |
|---|---|---|---|
| Brass / Bronze | Authentic appearance, good patina, easy to work with | More expensive, requires corrosion protection | High-quality replicas and fine details |
| Steel | High durability, realistic appearance | Heavier, can rust without treatment | Functional replicas and robust models |
| Resin | Allows complex details, lightweight, economical | Fragile in thin parts, less metallic feel | Figures and ornamental pieces |
| Wood | Aesthetic warmth, easy to model | Less realistic for metal armors, susceptible to humidity | Historical models and supports |
| 3D Printing (PLA, resins) | Customization, speed, geometric complexity | Finishes require sanding and painting, variable durability | Prototypes and custom pieces |
Scales, sizes, and how to choose the right one
Choosing the scale depends on the objective: display on a shelf, diorama, showcase, or study. Here is a quick guide.
- 1:6 (approx. 30–40 cm for a knight’s armor): perfect for prominent collections with high levels of detail.
- 1:10 – 1:12 (20–35 cm): balance between detail and space, ideal for dioramas.
- 1:18 and smaller: small pieces for showcases with multiple elements and historical contexts.
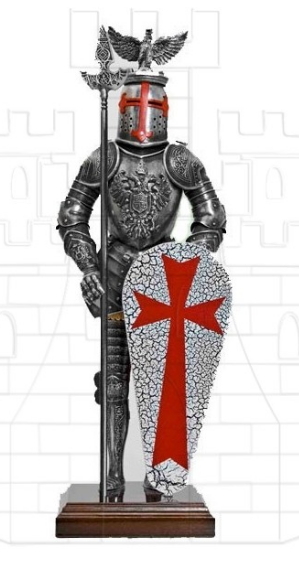
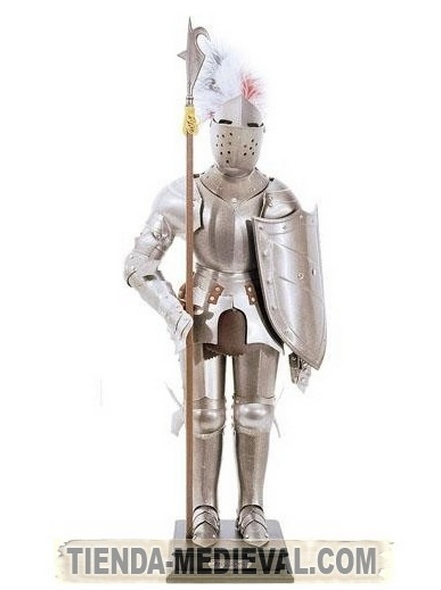
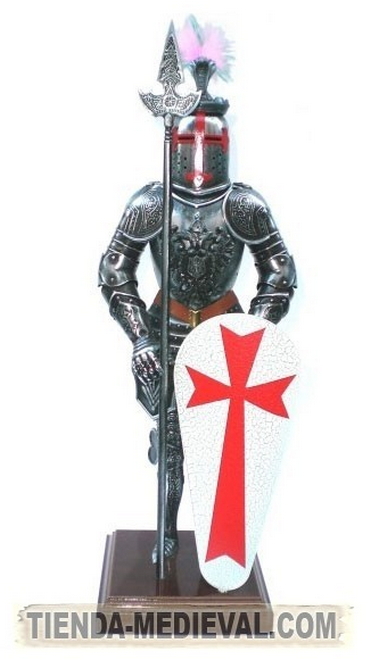
For guidance, the pieces in the old article fit these references: the 42 cm Templar eagle armor and the 42 cm Templar armor are on a visually appealing scale for shelving, while the 54 cm medieval armor represents a larger presence, almost as a centerpiece in a room dedicated to the theme.
The scale also influences the complexity of the joints: larger pieces allow for more realistic rivets and welds; smaller ones use micro-screws, pins, and special adhesives.
Modern techniques: 3D printing, CNC, and casting
The digital revolution has changed how miniatures are produced. 3D printing and CAD modeling allow for the rapid creation of complex geometries to scale. Combined techniques—printing for patterns, casting for the final metal piece—offer the best of both worlds.
3D printing is very useful for prototypes and ornamental details. Brass or bronze casting adds weight and authenticity. CNC is used for flat parts and bases, where cutting precision makes a difference.
How to evaluate historical fidelity
If your interest is historical, pay attention to six key elements:
- Proportions of the helmet and visor.
- Type of mail and plate overlap.
- Type of rivets and their arrangement.
- Surface finish: polished, burnished, or patinated.
- Textiles and embellishments: leather, lining, and scaled embroidery.
- Attached documentation: photographs or historical references.
A replica that provides notes on the era, function, and variations offers more value to collectors and scholars.
Conservation, cleaning, and maintenance
Miniatures require specific care depending on their material. A basic plan:
- Avoid humidity and sudden temperature changes.
- Clean dust with a soft brush or low-pressure compressed air.
- Remove fingerprints from brass or steel with a microfiber cloth and suitable metal products, always testing on invisible areas.
- Apply a protective layer: microcrystalline wax on metal pieces, or a transparent sealant on painted resin.
If the miniature has movable assemblies, lubricate with minimal amounts of machine oil to prevent stiffness and corrosion.
Lighting and mounting for display
A well-lit miniature not only stands out on a shelf; it tells a story. Practical tips:
- Use warm light for golden or bronze metals; neutral light for polished steel.
- Avoid direct sunlight that degrades pigments and textiles.
- Display cases with dark backgrounds increase contrast and allow for discreet LED spotlights.
- Balanced supports: a small wooden or marble base adds visual weight and stability.
Integrating the original images into the narrative
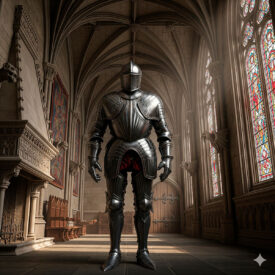
The three pieces present in the old article well represent the possibilities: from medium pieces of 42 cm to the grand presence of 54 cm. We place the images here so you can evaluate proportions and finishes in context.
Comparison: decorative replica vs. didactic model
Understanding the purpose of the piece will help you choose wisely. Below is a comparative table with key attributes.
| Attribute | Decorative Replica | Didactic Model |
|---|---|---|
| Priority | Aesthetics and visual fidelity | Functionality and analysis |
| Typical Material | Brass, resin, alloys | Wood, technical plastic, metal |
| Movable Details | Few, for stability | Joints and movement tests |
| Documentation | Historical and artistic references | Plans, loads, and experimental methods |
| Audience | Collectors and decorators | Students, engineers, and researchers |
Myths and realities about miniature armors
Myth: “A small miniature cannot be faithful”. Reality: fidelity depends on the process; a well-modeled and finished piece can reproduce scales, rivets, and textures even in reduced scales.
Myth: “Authentic metal is always better”. Reality: it depends on the objective. For shelf display, brass or treated resin can offer a balance between aesthetics, weight, and cost.
The historical and emotional value of a miniature
A well-chosen miniature functions as a narrative anchor: it opens conversations about historical contexts, forging techniques, and symbolism. For the history enthusiast, each rivet can evoke a campaign, a family, or a military order.
How to commission or customize a miniature
If you are looking for something unique, plan these steps:
- Define the purpose: display, research, diorama.
- Choose scale and materials based on space and durability.
- Provide visual or historical references: photographs, sketches, or exploded views.
- Decide on the finish: patina, burnishing, paint, or scaled textiles.
- Request digital prototypes (renders) or 3D prints before final casting.
A well-planned commission reduces rework and ensures a piece that meets aesthetic and historical expectations.
Key questions before buying a miniature (your checklist)
- What scale fits my space and collection?
- What material provides the finish I’m looking for?
- Does the piece include documentation or historical references?
- Does it require special maintenance?
- Does it integrate well with existing lighting and furniture?
Answer these questions before deciding and you will avoid impulsive purchases that later do not fit your aesthetic or display.
Relationship between miniature armors (replicas) and structural armor models
As mentioned earlier, the term “armor” encompasses two worlds. In engineering, miniature-replicas of structural armors (trusses) are analytical tools. They maintain the principle of triangulation and serve to study load transmission. In reenactment, miniature body armors recreate appearance and defensive function. Both fields share a quest: to reproduce in miniature the essence of the original.
3D printing and CAD modeling have united both universes: engineers and artisans use the same tools to reproduce geometries with precision, whether it’s a helmet slider or a bridge truss joint on a scale.
Ideas for thematic exhibits
If you want to set up a small but impactful exhibition, consider these approaches:
- By epoch: group pieces from the same century to show the evolution of protection.
- By function: cavalry, tournament, and campaign armors.
- Contextual diorama: include a scaled human figure to demonstrate ergonomics.
- Contrast materials: metallic pieces alongside resin pieces to discuss reproduction techniques.
Long-term preservation and collection management
A minimum preservation plan for a small collection includes inventory, high-resolution photographs, humidity control, and a cleaning schedule. Document each piece: origin, scale, materials, acquisition date, and observations on condition.
Practical example: how to measure and photograph your miniature for cataloging
Measure: use calipers for key dimensions (helmet height, shoulder width, breastplate length). Photograph: diffuse side light, neutral background, and close-ups of details (rivets, assemblies, patina). Save photos in lossless formats and annotate with basic metadata.
Resources and techniques for miniature restorers
Restorers typically work with micro-tools: fine files, scalpels, low-volume epoxy adhesives, and oil or acrylic paints for touch-ups. For metals, micro-sanding followed by protection with microcrystalline wax is standard.
Final words inviting appreciation
A miniature armor can be a fragment of the universe: an accessory that connects the observer with forging techniques, tactical decisions, and the aesthetics of past eras. Choosing it well involves a balance between history, technique, and personal space.
Make conscious decisions, document your collection, and let each piece tell its own story in your home. Thus, every day, the miniature will be a tangible reminder of exploits, crafts, and legends.

